Adobe 入门指南
This document explains how to install the FlexLink plugin into your Adobe applications to use Flexbar’s Adobe integration features.
Since the FlexLink plugin is built using the legacy Adobe CEP framework, it may not run properly on Apple Silicon devices. We’re actively working on a new UXP version to replace it.
启用开发者模式
首先,更新以下 Adobe 设置以防止您的主机应用程序(Photoshop、InDesign 等)显示关于未签名扩展的警告。有关更多详细信息,请参阅 HTML 扩展手册 中的 调试未签名扩展 部分:
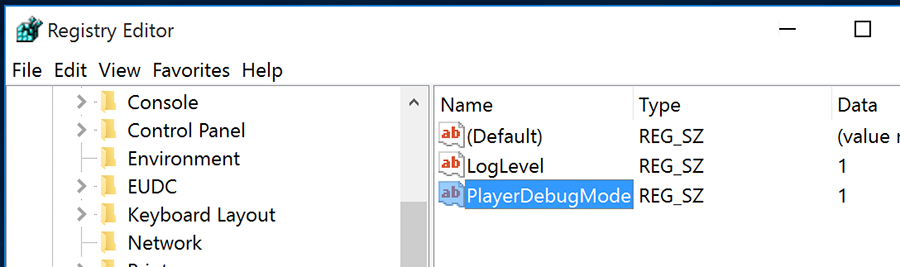
Windows:打开 regedit 并导航到
HKEY_CURRENT_USER/Software/Adobe/CSXS.<X>。添加一个名为PlayerDebugMode的新字符串值,并将其设置为1。⚠️ 确保
PlayerDebugMode中没有多余的空格。
Mac:打开 终端 并运行:
defaults write com.adobe.CSXS.12 PlayerDebugMode 1defaults write com.adobe.CSXS.12 AllowUnsignedExtensions -bool true⚠️
CSXS.<VERSION>需要根据您的 Adobe 软件版本进行调整,2025 年为版本 12,2024 年为版本 11
在 Windows 上,Regedit 位于 C:\Windows\regedit。您可以从 CMD 打开它,或者按 WIN + R 并输入 regedit。

在 macOS 上,终端位于 应用程序 > 实用工具 > 终端。
安装 FlexLink 插件
下载并解压 FlexLink 压缩包。将 com.eniac.FlexLink-1.0 文件夹复制到相应的目录:
以下路径是 2025 版本的默认安装位置。根据您的设置需要调整它们。
Windows
Adobe Premiere Pro:
C:\Program Files\Adobe\Adobe Premiere Pro 2025\CEP\extensionsAdobe Photoshop:
C:\Program Files\Adobe\Adobe Photoshop 2025\Required\CEP\extensions
macOS
Adobe Premiere Pro:/Applications/Adobe Premiere Pro 2025/Adobe Premiere Pro 2025.app/Contents/CEP/extensions
Adobe Photoshop:/Applications/Adobe Photoshop 2025/Adobe Photoshop 2025.app/Contents/Required/CEP/extensions 您可能需要右键单击应用程序并选择”显示包内容”来访问这些文件夹。将 com.eniac.FlexLink-1.0 文件夹复制到相应应用程序的扩展目录。
验证安装
启动 Adobe 应用程序后,转到 窗口 > 扩展 并查找 Flex Link。
You’re all set! Flexbar’s Adobe integration is now ready to use.